Hey everyone!
I hope you’re all well.
I will be sharing a simple DIY on how to make a unicorn bunting that’ll be ideal for either a child’s room or nursery.
It’s the perfect project to try at home with the kids esp during these quarantine times. I was clearing out my closet and came across a whole lotta crafts and supplies that I hadn’t used and thought it’d be the perfect opportunity to share it with you.
Things you need;
* Unicorn cut-outs (though you can use any other animal shape you prefer)
* Colored tissue paper
* Coloured string
* Scissors
* Irridescent ribbon (optional)
Method;
You can either buy an already cut out unicorn shape from the shop. Alternatively you can make one of your own by downloading a template and cutting it out on desired paper.
My sister had sent me these so I’m not sure where she got them from. However, you can usually find them at the stationary shops or online. They’re very easy to order. If you’re a brit, then the pound shop has a great variety of crafts like these. Don’t forget to check them out.
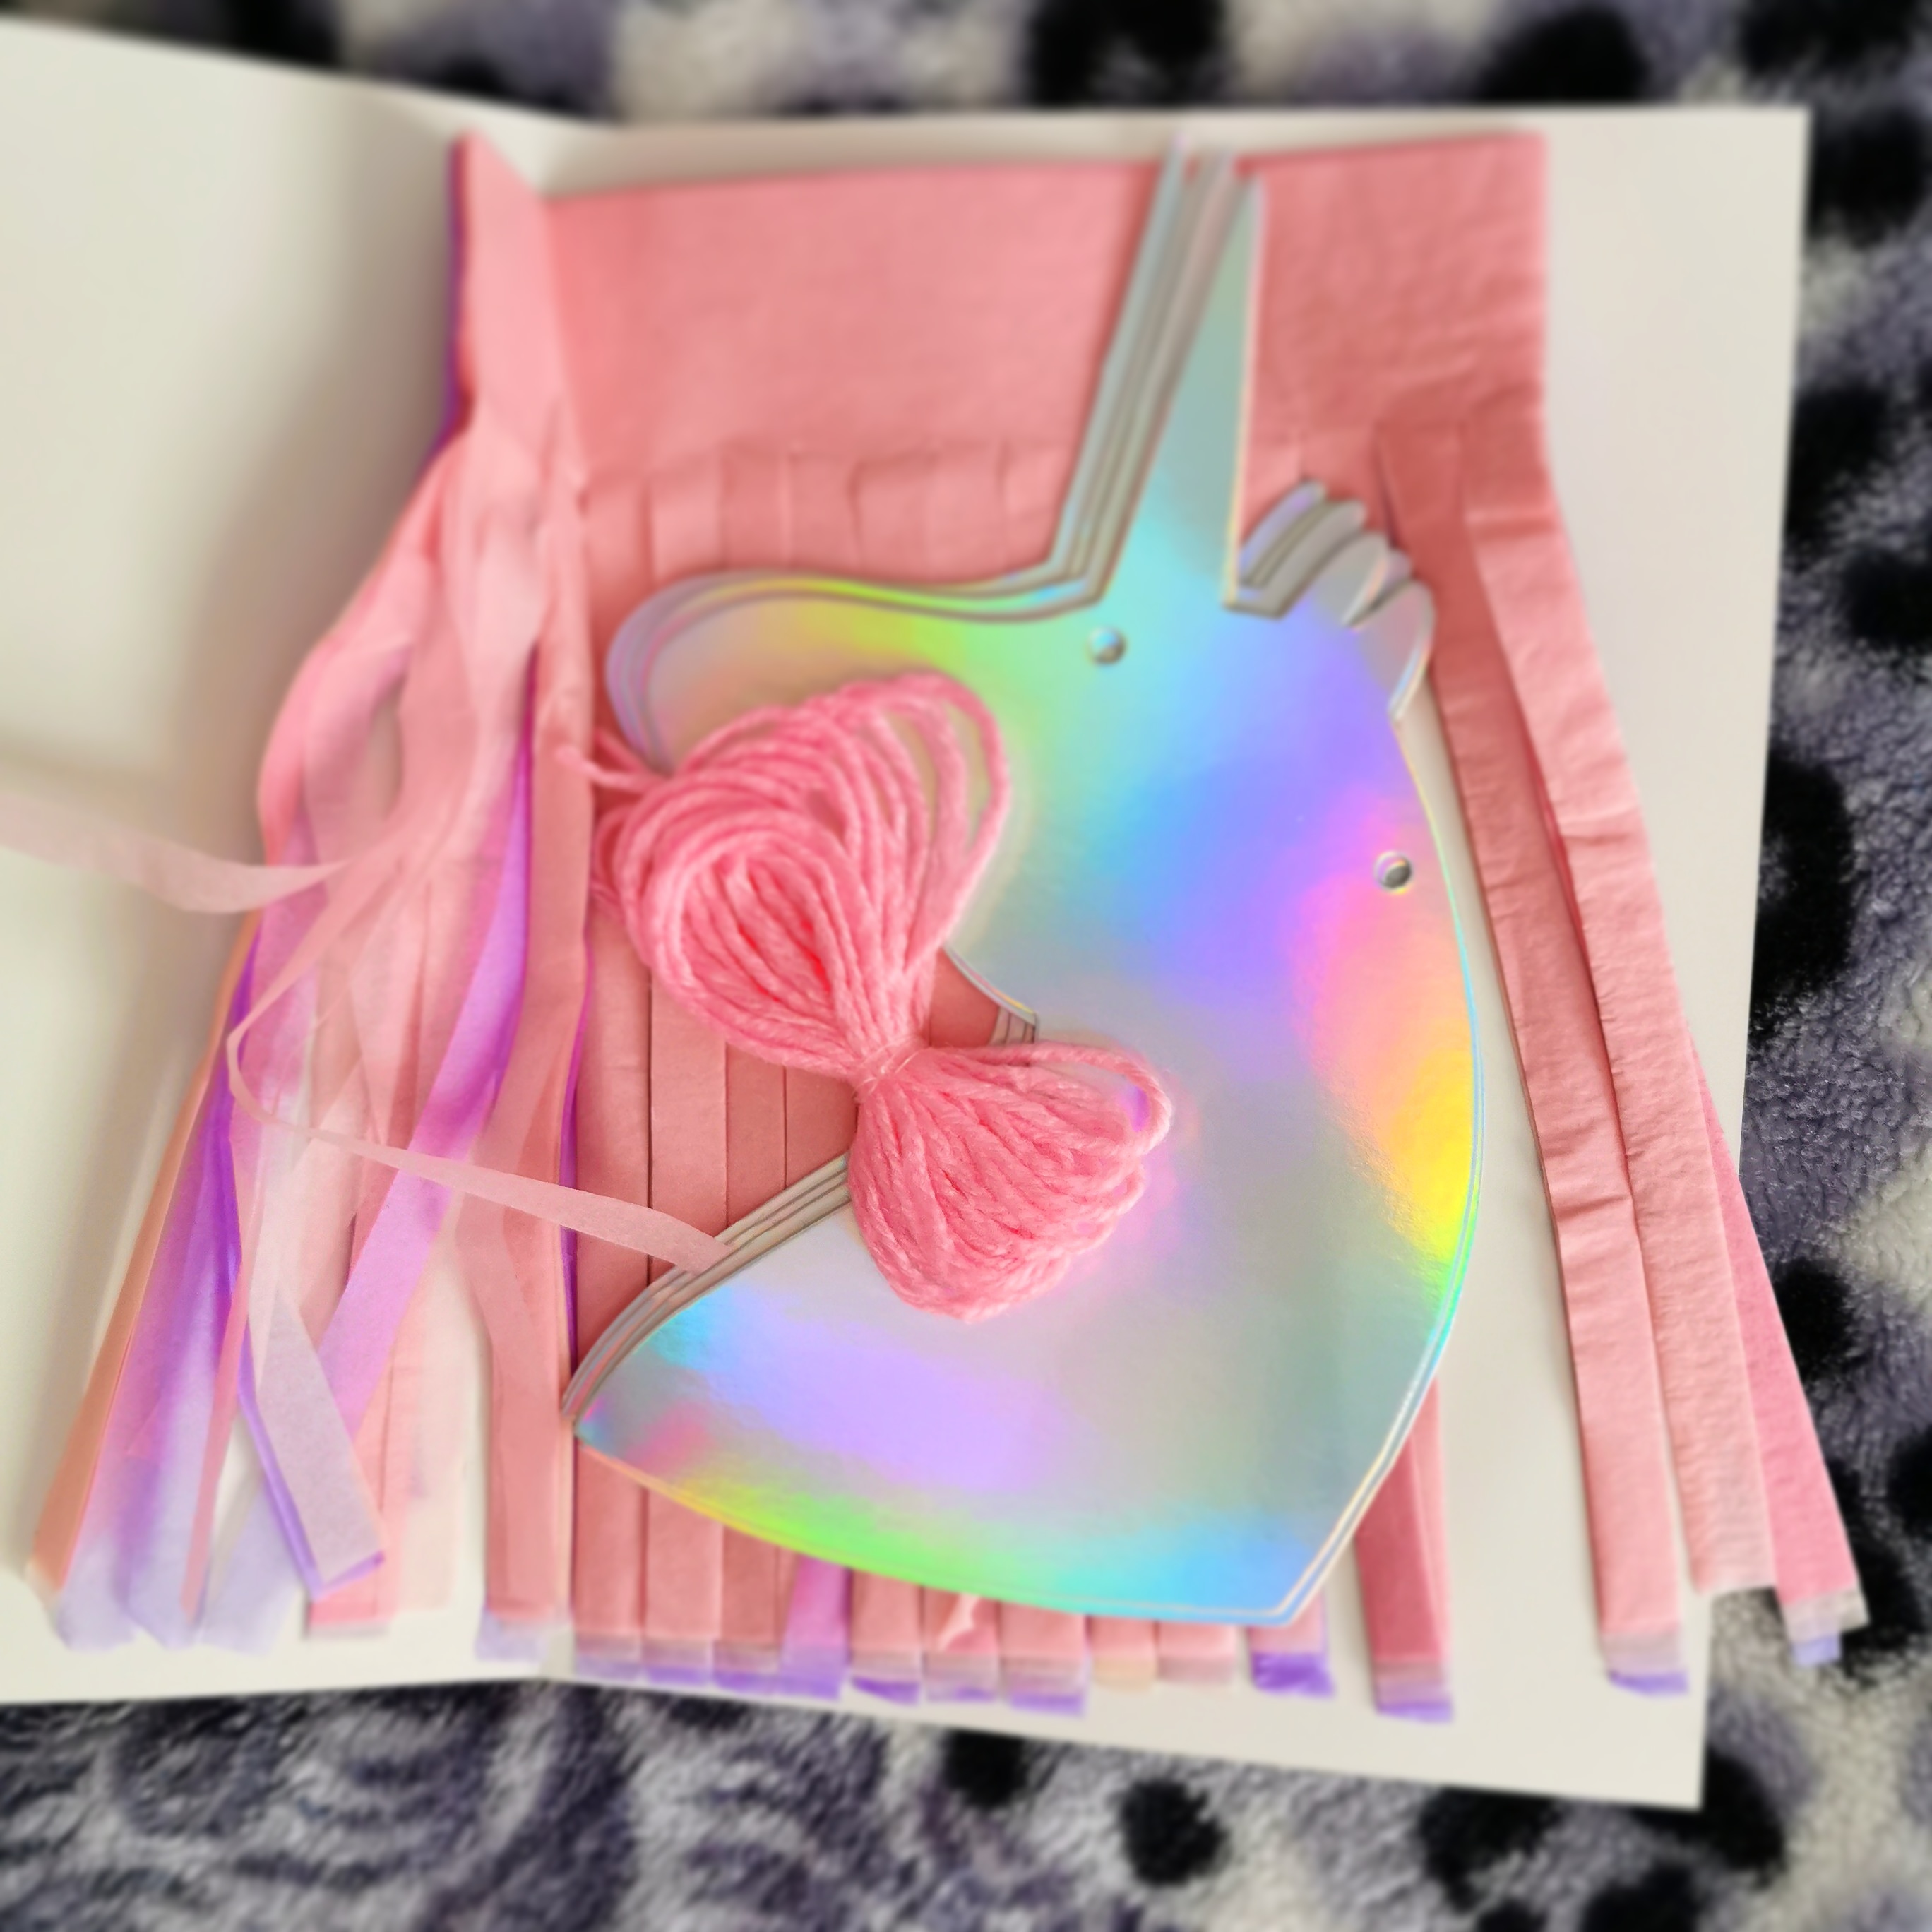
As it’s a unicorn bunting, I preferred to use an Irridescent one for this project. Make sure you whole punch two holes on the top end of the unicorns head. You’ll need this for stringing it all together at the end.

I’ll be using a mixture of pinks and purples (in various shades) for the unicorns mane. Also a pink string to tie it all together. Again, you can choose any colour combination you like.
It’s all about using your imagination and you can get as creative as you like with this project. Once you have all the supplies ready, you need to measure the string depending on how long or short you’ll like it. Once you’re happy with the length, the fun part starts. Yay!
Top tip:
If you plan to use a safari animal theme, then you can use browns, oranges and yellow tissue for the horses, pony or giraffe’s tail/mane.
Purples, greens and blues would look so mesmerising if you’re wanting a mermaid. The choice is endless!
You’ll need to lay each sheet of tissue flatly and will start folding it carefully starting from the bottom to the top (as above).
Now be careful as the tissue is very light and can tear easily if you’re very heavy handed. Just gently fold it as shown and make sure you reach to the top whilst ensuring the tassels are flat or else they’ll get tangled.
Don’t worry about the colour of the tissue looking very light. Once you’ve done the folding, it’ll become saturated and will darken due to the folds.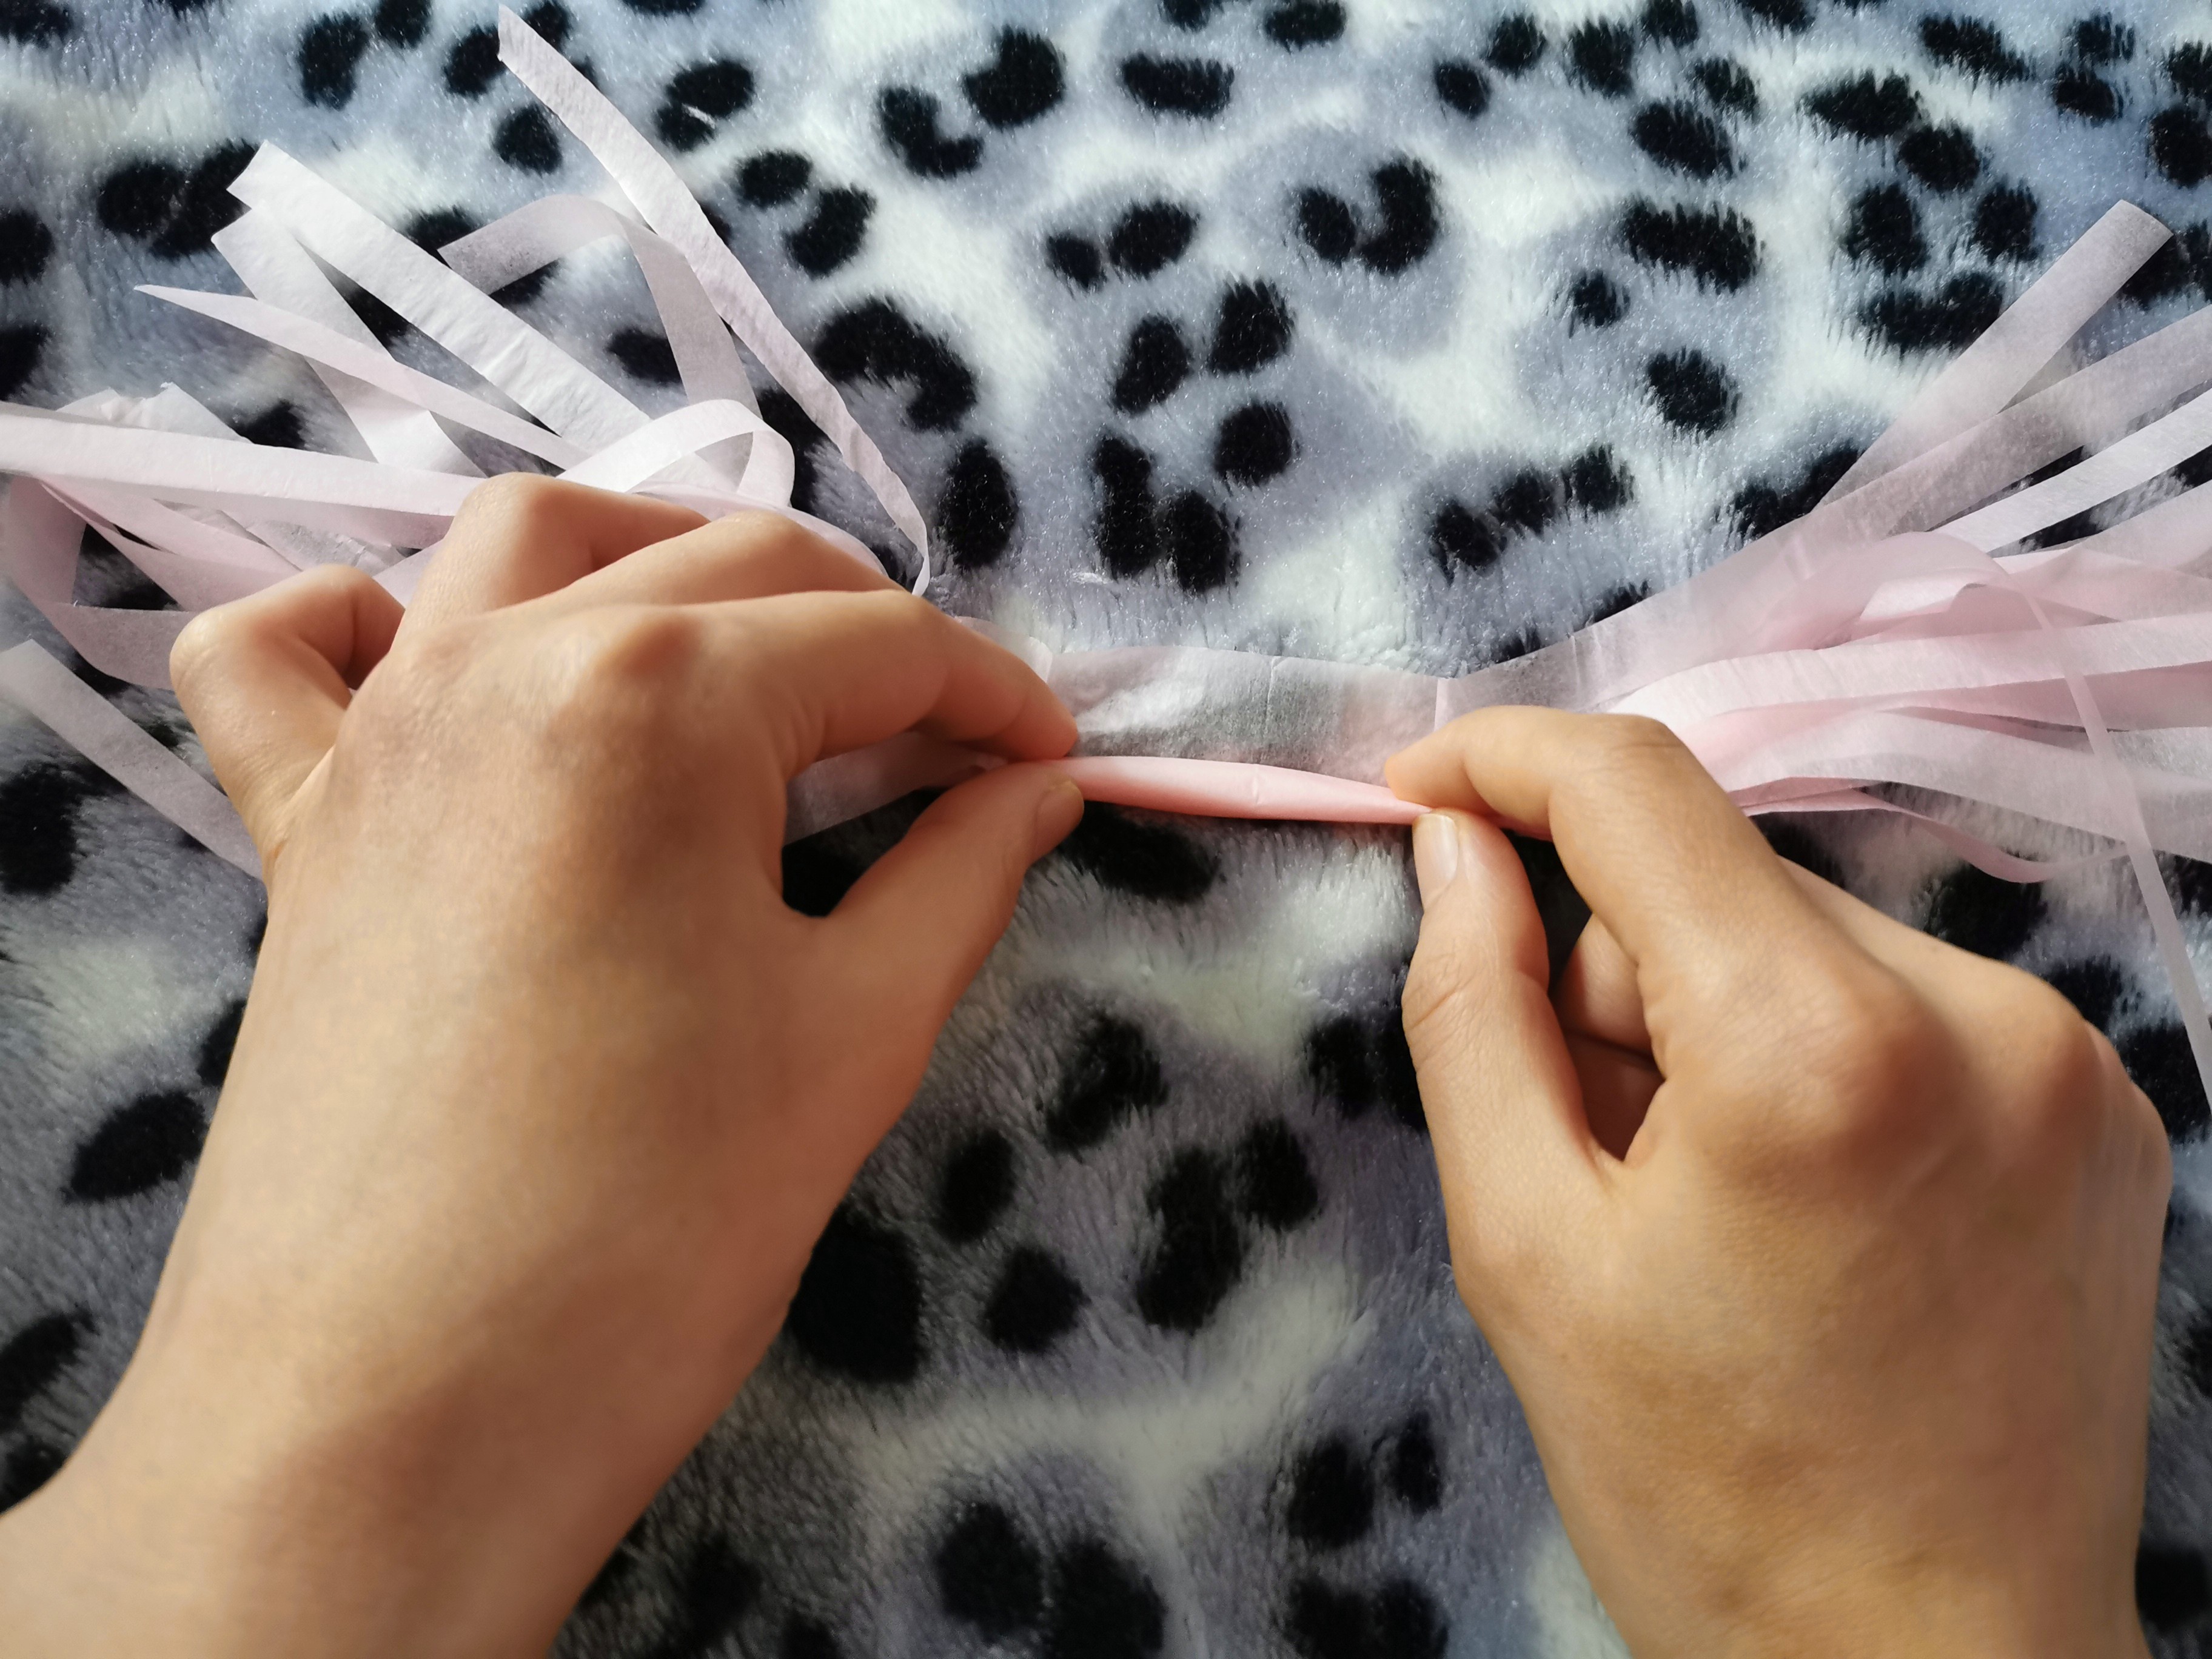
When you get to the top, separate the tassels to each side (ever so gently) and fold the tissue in half as shown below.
Ok, you’re doing great so far. See that wasn’t that hard was it?! Hee Hee 😁
So your tissue should look something like this. Once it’s securely folded in half, put it to one side (we’ll come back for it later) and continue with the remaining ones. Don’t worry, it won’t come undone. Make sure it’s folded in half though!
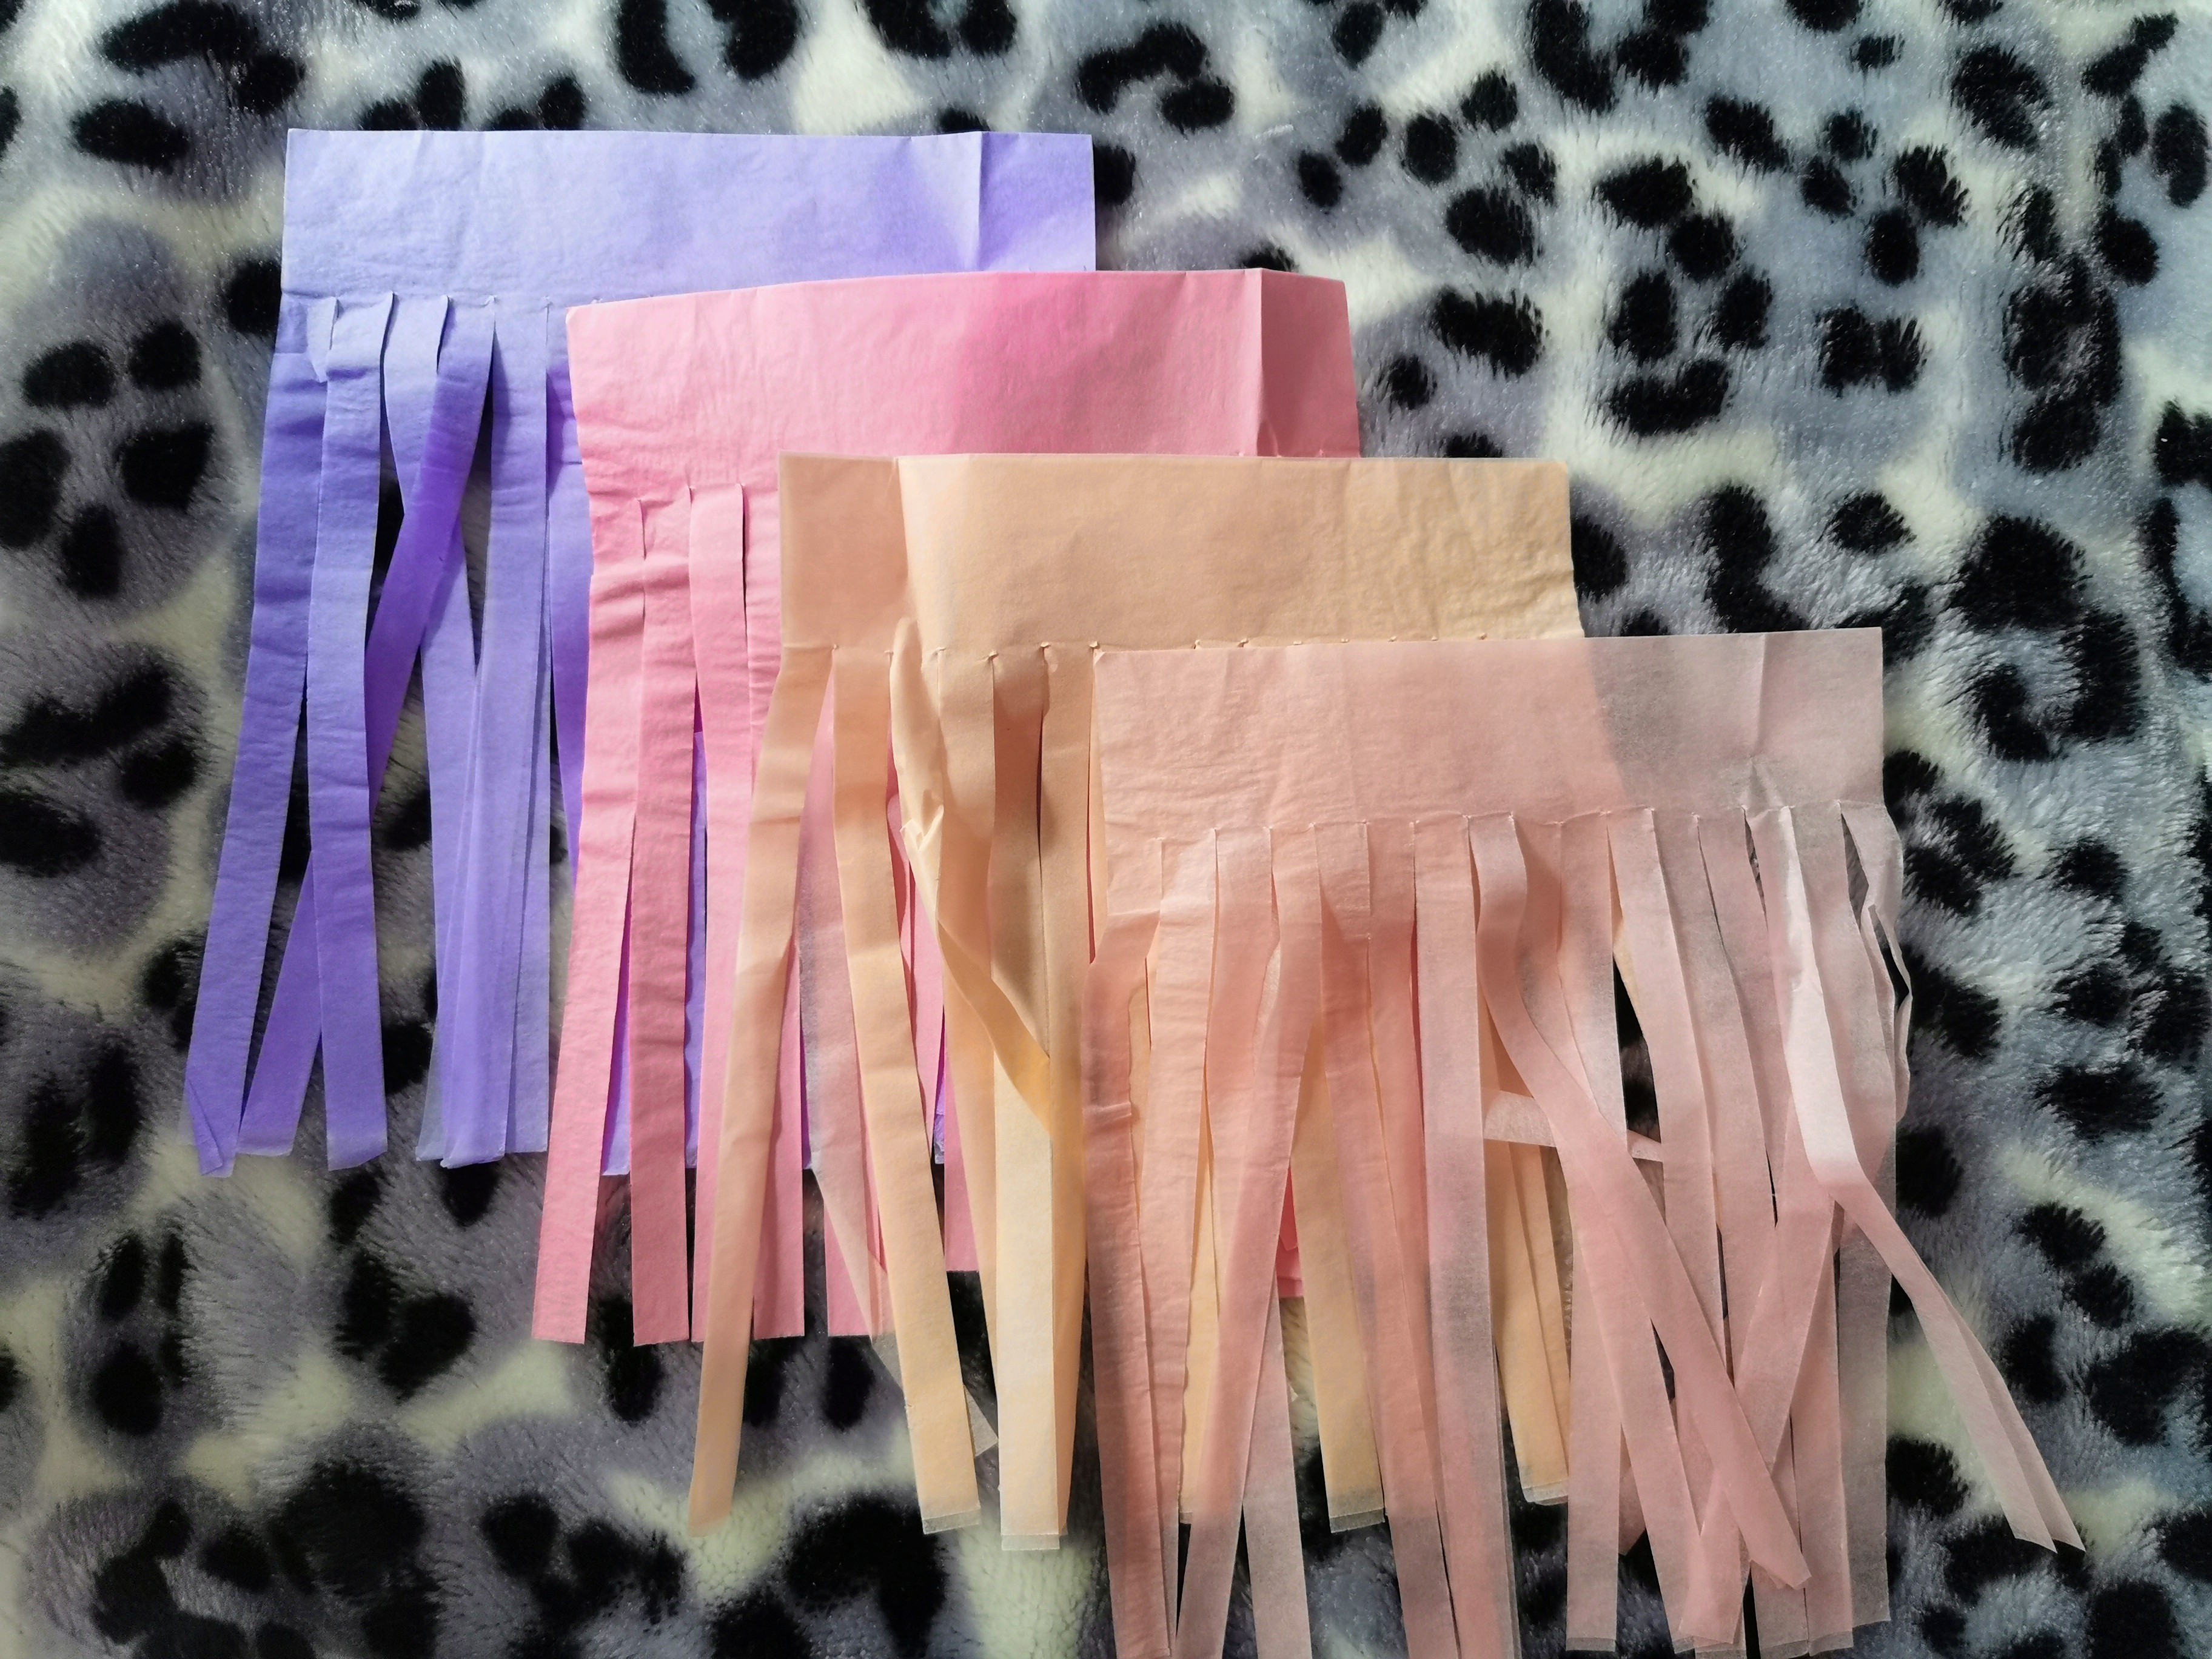
Once you’ve finished folding all of them, you should have a batch of them as below. Aren’t they looking so cute already?
You’ll be using these for the mane of the unicorn. You can choose to keep it as one colour or multi coloured as I have. You can also add different textures such as irredecent ribbon or strings of sequin, it’s all up to you!
Next, grab your string and tie a knot to it as you would a shoelace. It’s really quite simple. Nothing fancy shamancy! (or unless you want it to be.. Ha)
It honestly is so simple, that I feel its not even worth mentioning. However, do bear with me as I do explain it.

Once you’ve tied the knot to one side of the string, you will need to put your tissue over it (as shown below) and twist it so it secured itself. You don’t need any glue for this. Just use your hands to fold it a couple of times and it’ll be quite secure within itself.

See how simple that was.. Tadaa!!
Now, I wanted to create an ombre effect with the tails so I started using the darkest tissue (which is purple in my case) and gradually continuing to the lighter pink.
So, you’ll add the tissue, fold and twist it. Then you’ll add your unicorn to the string and will continue from right to left..
This is the reason why we needed to punch the two holes as you’ll be weaving the string so that the unicorns head is sat nicely along its tail..
Make sure the string is visible on the backside and not the front. Once you’ve done this, you’ll have something that looks like this..
Well done for getting to this stage. Now the fun sort starts! Ha!
Now, continue with the rest of the tassels and unicorns head in the same manner. Don’t worry about making it too close or farther away from each other as it can all be adjusted at the end.
The folded tissue can also be moved so you can easily adjust it according to your requirement.
Once you’ve strung them all together, your project is pretty much ready. You can move the unicorns further away or keep them close by to each other it’s all up to you!
Gosh, aren’t they looking so adorable. The irredecent head looks super cute when the light is shining on it. It’s a warm day today so they are really standing out. Your kids will absolutely love them!
And here is the final reveal.. *drum toll*…. Tadaa!!
The iridescent foil finish will look like the unicorns are wearing fairy dust. And their tassel mane fall enchantingly against it. The ombre effect adds to the charm! 🧚♂️
The unicorn garland can be hung on walls, doorways or pretty much anywhere you want it. It’ll bring happiness to everyone who sees it as well as much joy to the children.
Let the magic begin by transforming your baby’s room into a magical place with a simple bunting that’ll turn her room into a glittery fun unicorntopia! 🦄🌟🌈
(Please head over to my insta-stories to see how I’ve styled it in baby Anaya’s room. It can’t be captured in pictures so I will put up a video of it over on my IG.. 🤩)
Did you enjoy the DIY? What mystical creature would you like to make a garland of? And finally are you a unicorn or a mermaid person? Let me know below..
Instagram: here
Sending lots of fairy dust your way!
Until next time,
Sheema xo

Aww lovely! 🦄
LikeLiked by 1 person
Thank you so much love 😘
LikeLiked by 1 person
This is such a creative idea, love it!
LikeLiked by 1 person
My pleasure, hope you’re well!
LikeLiked by 1 person
Thank you so much my lovely, I had some supplies leftover from my precious project and thought why not make something out of it 😁 xoxo
LikeLiked by 1 person
I’m keeping well thanks hun, a little busy with a newborn but it’s been wonderful thus far. Hope you guys are keeping safe xx
LikeLike
It’s fabulous! I wanted to be a mermaid when I was a kid so I guess mermaid for me haha!
LikeLiked by 1 person
Aww that’s so sweet! 💜💙Mermaids are just so mystical, perhaps I should do a mermaid one when I can get the supplies after quarantine.. You’ve just given me an idea. Thank you so much for reading hun 🧜♀️ xoxo
LikeLike
Thank you.. Lovely quarantine activity
LikeLiked by 1 person
Thank you so my h love. I’m so glad you enjoyed it. I hope you guys are keeping safe xx
LikeLike
These are so adorable!
LikeLiked by 1 person
Thank you so much lovely, it was so fun to make 😍 xx
LikeLiked by 1 person
this is the cutest little project i have ever seen and so easy too 🙂 thanks for sharing 🙂
LikeLiked by 1 person
Aww you’re very welcome sweet, it was so much fun to do 💕😁 xx
LikeLike